Tips and Tricks:
Some useful notions I've come across.
: EZ-Off oven cleaner strips enamel paint off a plastic model quite well.
: To break an old model apart, put it in the freezer for a few hours. The pieces should pop apart with a little pressure. The plastic itself will become brittle too, so be careful. You can also wet the model before freezing. The water expansion as it freezes can aid in separating the joints.
: Keep lots of sprue around. Some interesting pieces can be used in kit bashing and they are particularly excellent for adding structural reinforcement to any other model or kit bash you have in mind. Simply glue them to the inside of your piece and generously putty over for an ultra-strong (relatively) superstructure.
: Plastic food/product containers make for great sci-fi buildings and other shapes -and they're always to scale!
: Since the first, I have been scanning all decals at 600 dpi. Step one is to save off a raw, uncompressed master. Always! Next step is saving a 'clean master' to work on. Go through and dust, repair and color correct this one. If there's any further work (like cutting, moving, modifying a name, number or colors), save a new master for this! The Raw Master serves as your ultimate backup. The Clean Master
is your 'work print' as it were. And any Custom Master serves as your home brewed version. Simple photoshop skills. No worries of ruined decals ever again!
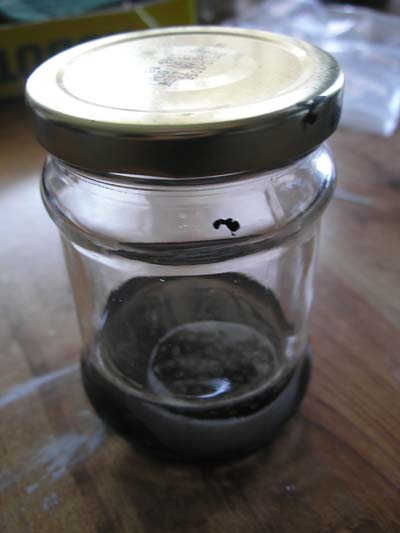
: I learned this one in art class way back. Get a sealable jar or metal can (old coffee can, sauce jar, etc. Base the size off of your projected use). This is the new repository for your thinner/cleaner. You're not done yet.

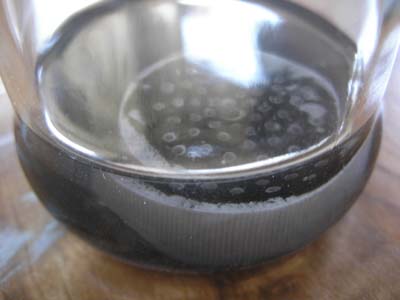
Next, find a smaller metal can/jar lid that will fit inside and rest solidly at the bottom of the larger container. Flip this small can over so its' bottom is up. Into this surface, poke as many holes (a nail works well) as you can (without completely destroying the surface). Also, poke two or three equidistant holes around the perimeter of the top walls of the small can. Put the small can, bottom up, into the larger can and add your cleaning solution to just above the small can's height.
As you sweep your brush across the punctured surface, the holes agitate the paint off the bristles and allow the paint to settle to the bottom. The perimeter holes allow for easy diffusion of liquid between inner and outer can. A piece of window screening will also theoretically work instead of the smaller can, but won't be as stable over time.
While the whole cleaning solution will get very cloudy while in use, once the paint particles settle in the bottom an hour later, you essentially have brand new cleaning solution. Keep your lid tight to avoid evaporation.
Over time, top off the cleaning solution as some of it will bind to the paint and/or evaporate, despite the tightest of seals. You've just gone from using lots of cleaner to next to none!
